


As it turns out, you all freaking LOVE focaccia!
In an exciting and relatively new development for Plated by Liz, I think it’s safe to say I’ve had my first truly viral recipe. My original Same-Day, No-Knead, Cast Iron Focaccia absolutely blew up on the internet, racking up over 1.4 million views! But with great focaccia comes great responsibility, and the questions were flying left, right and centre.
And while I have a lot of the answers, I am merely human, and I don’t have them all!
The most common question by far was: “What if I don’t have a cast iron pan?”
The short answer: get one.
Seriously though! It’s a relatively small investment, and they’re incredibly durable. I’m pretty sure my grandchildren will be fighting over who gets to take mine once I’m gone.
The number one reason I love cast iron, though, is the crust it creates when searing meat, veggies, anything! It’s unmatched by any other pan. And for someone who’s all about a good crusty bread, making focaccia in cast iron was a pretty natural fit.
BUT I understand. You want your focaccia today, and you don’t have a cast iron pan. Fear not! I put four different cooking vessels to the test, and yes, I made four loaves of focaccia... in the name of SCIENCE people!
Check out the experiment video here
The experiment
I made one giant batch of dough, divided it equally, and baked four focaccias in four different vessels:
10-inch cast iron pan: the OG.
10-inch stainless steel pan: with sloped sides.
9.5 x 13-inch baking sheet: a little more room to spread out.
11-inch ceramic pie dish: another potential cast iron alternative.
Same dough, same recipe, same oven temperature and cooking time.
The results are in!
1. The OG cast iron — the clear winner
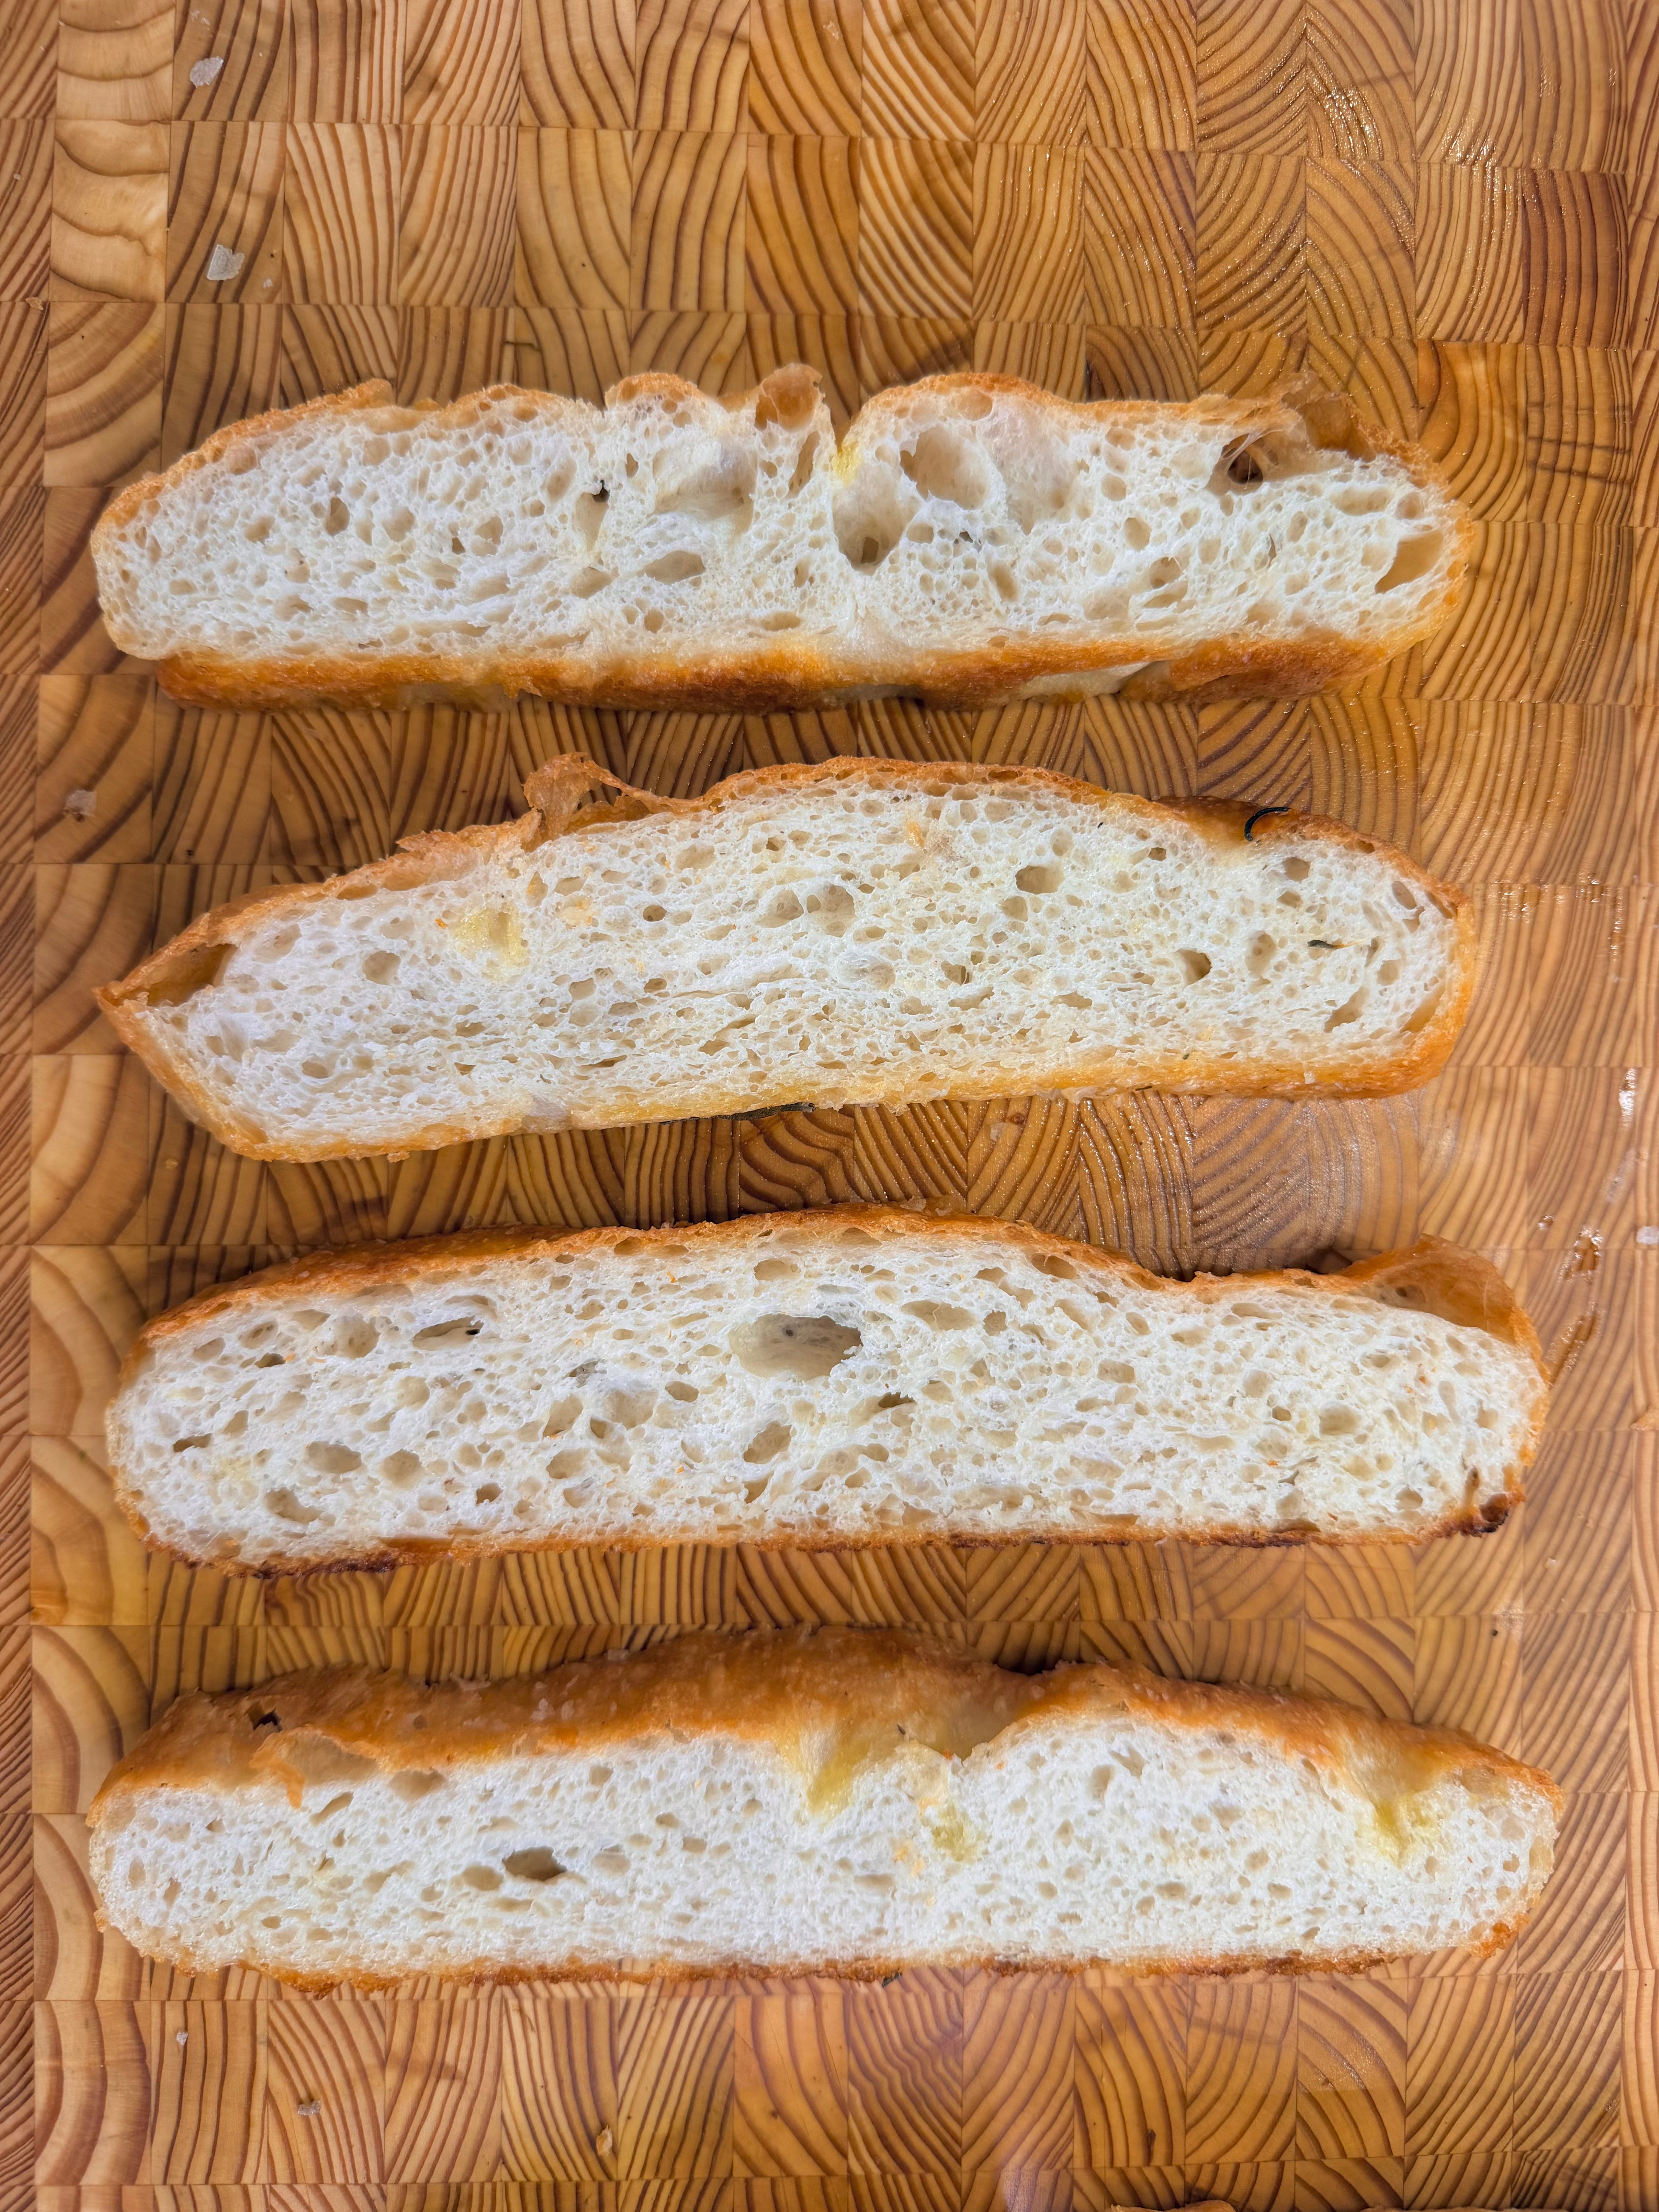
No real surprises here. The cast iron produced the crispiest crust overall, particularly on the bottom and sides, while still delivering an incredible rise and those big, beautiful bubbles. It also happened to have the crispiest top in my test. That deeply golden, almost fried crust is exactly why I love baking focaccia in cast iron.
2. Stainless steel — a very close second
I was pleasantly surprised by this one! It produced a beautifully crisp bottom and decent bubbles. The sloped sides meant the dough spread a little differently and didn’t rise quite as tall as the cast iron, and the top wasn’t quite as crisp. Still, a very respectable alternative.
3. The baking sheet — best crumb
This one was a nice surprise! While the larger surface area meant the dough spread out more and didn’t rise as tall, when I cut into it, I was shocked! The cross-section was BEAUTIFUL. This one produced the airiest bubbles of the bunch.
4. The ceramic pie dish — not quite what I hoped for
The dough rose beautifully, reaching a similar height to the cast iron, but the crust just wasn’t there. Unlike the other vessels, the bottom, sides and top were noticeably softer. Still perfectly good focaccia, but not my first choice if you’re after that crispy crust.
So, what’s the verdict?
First things first: you do not need cast iron to make this focaccia. This recipe is forgiving, and you can absolutely make it work with other baking vessels.
A few key takeaways:
For the crispiest crust: cast iron wins, with stainless steel coming in a close second.
For the airiest crumb: the baking sheet takes the prize.
For everything else: use what you’ve got! Your focaccia might turn out a little differently, but it’ll still be delicious.
And finally, if you’re looking for healthy bread, I’ll ask you to please join the several hundred other people in the comment section and kindly redirect yourself to another part of the internet.
This isn’t meant to be health food. But I will argue that food that tastes good and makes you happy surely must play some part in our overall health. And frankly, I’m willing to die on that hill.
And with that, I’ll leave you and your carbs! Happy baking.
I’ve also included the original recipe again below for anyone who missed it the first time around. Don’t be shy with the questions and comments (unless it’s about how much olive oil I’m using!).
Same-Day, No-Knead, Cast Iron Focaccia
Ingredients
For the focaccia:
400 g (3¼ cups) all-purpose flour
360 g (1½ cups) lukewarm water
7 g (1 packet / 2¼ tsp) instant yeast
8 g salt (3 tsp Diamond Crystal kosher salt, 1¾ tsp Morton kosher salt, or about 1½ tsp fine sea salt / table salt)
7 g (1 tsp) honey
54 g (4 Tbsp) extra-virgin olive oil, divided
For the pan & topping:
14 g (1 Tbsp) unsalted butter, softened, for greasing the pan
Flaky sea salt, for finishing
Fresh rosemary or thyme
Extra-virgin olive oil, for serving
A note on measuring: This is a high-hydration dough, so small differences in flour measurements can make a noticeable difference. If you have a kitchen scale, use it! The gram measurements are the most accurate and are the ones I use.
A note on salt! Different types of salt vary in density. That means that a teaspoon of Diamond kosher salt is not the same as a teaspoon of table salt. If you’re using fine sea salt or table salt, don’t substitute it 1:1 by volume with kosher salt. Aim for 8 g by weight, or use the approximate volumes listed above in the ingredients.
Method
1. Mix the dough
In a large bowl, whisk together 400 g (3¼ cups) all-purpose flour, 7 g (1 packet / 2¼ tsp) instant yeast, and 8 g (3 tsp) Diamond Crystal kosher salt (or refer to salt conversion above).
In a measuring cup, stir 7 g (1 tsp) honey into 360 g (1½ cups) lukewarm water until dissolved.
Pour the water mixture into the flour and stir until there are no dry streaks remaining.
The dough will look extremely wet and sticky. That’s exactly what you want.
2. Let it rise
Pour 2 Tbsp of the olive oil into a medium bowl. Transfer the dough to the bowl and turn it over to coat it completely in oil.
Cover tightly and let rise at room temperature for about 2–3 hours, or until the dough is very puffy, jiggly, and full of visible bubbles.
Overnight option: You can also refrigerate the dough for 8–24 hours. Let it come to room temperature before continuing with the recipe.
3. Get it into the pan
Generously grease a 9-inch cast iron pan with 1 Tbsp softened butter, then pour 1 Tbsp olive oil into the centre of the pan.
Using your hands, gently transfer the dough to the prepared pan.
With lightly oiled hands, gently stretch and fold the dough over itself four times, working your way around the dough. Keep everything loose and gentle—you aren’t trying to knead the dough or create a perfectly shaped ball.
Flip the dough seam-side down and leave it in the centre of the pan.
Let it rise, uncovered, in a warm spot for 1–2 hours, or until very puffy and nearly filling the pan.
Tip: Start preheating your oven here! I’ve recently learned that a long preheat helps things bake more evenly, and I usually start preheating 45-60 minutes in advance (if I remember).
4. Dimple & bake
When you’re ready to bake, make sure the oven is preheated to 450°F (230°C) with a rack in the middle position.
Drizzle the remaining 1 Tbsp olive oil over the surface of the dough.
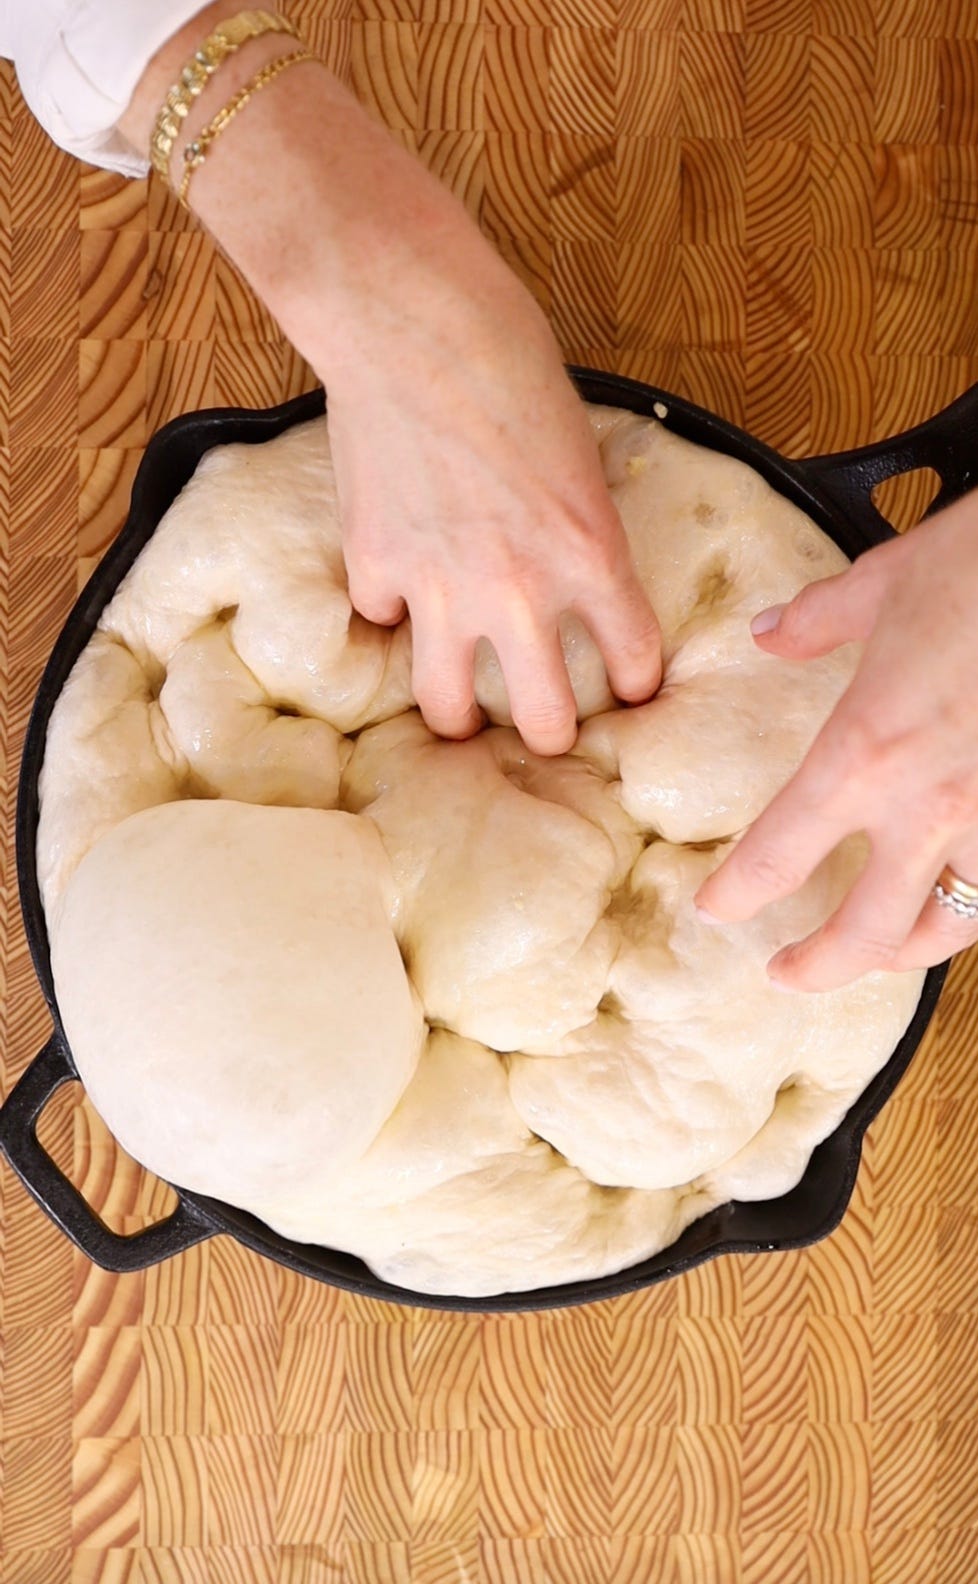
Lightly oil your fingers, then press straight down through the dough until your fingertips reach the bottom of the pan, creating deep dimples across the entire surface.
Sprinkle generously with flaky sea salt and, if you like, fresh rosemary or thyme.
Bake for 25–30 minutes, until the focaccia is deeply golden brown on top and the bottom is crisp and sizzling in the olive oil.
Let it cool for a few minutes before cutting.
Serve with plenty of good extra-virgin olive oil for dipping.
A few tips:
Don’t add flour. I mean it. This dough is supposed to be ridiculously wet. The high hydration is what gives you that light, airy interior.
Don’t overthink the folds. Four gentle folds are plenty. You’re just giving the dough a little structure before it goes into the pan.
Watch the dough, not the clock. Fermentation time will vary depending on the temperature of your kitchen. If your dough isn’t puffy and bubbly after 2½ hours, give it more time. If it’s ready sooner, move on.
And use enough olive oil. The oil in the pan is what gives this focaccia its ridiculously good, crisp, almost fried bottom. If you’re going for a healthy bread recipe, you’ve come to the wrong place.
This recipe is quickly approaching GOAT status